How do I Create a Service Plan in Windows Reseller Hosting Account?
Watch Reseller Hosting Video Tutorial
Procedure
Procedure to Create a Service Plan in Windows Reseller Hosting Account :
Windows Reseller Web Hosting comes with Plesk Control Panel. You will be able to create a service plan in your windows reseller web hosting account.
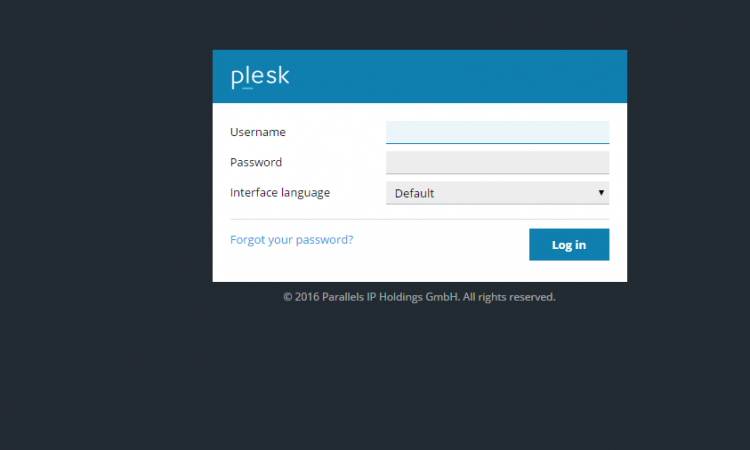
[1] Login into the plesk control panel.
https://servername.com:8443/
or
https://serverip:8443/
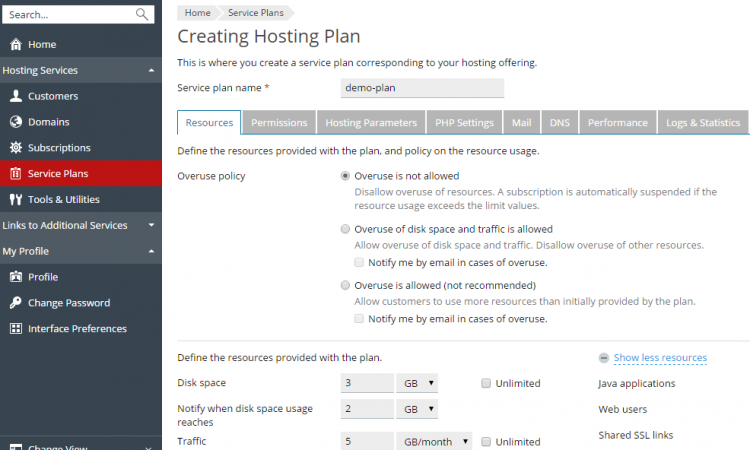
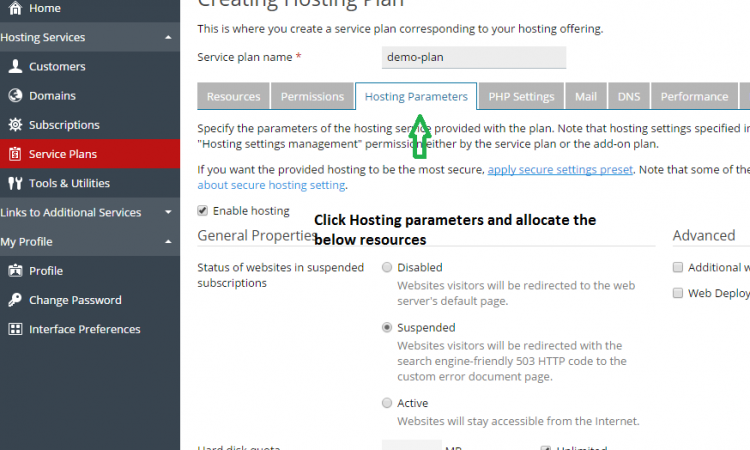
[2] Click on Service plans
[3] Click on Add New plan.
[4] Give your Reseller plan name.
[5] Under Resources option you can set the following values.
* Choose Overuse policy as Overuse is not allowed.
If you want, you can enable Suspend subscription when its disk space or traffic usage goes beyond the limit.
* Disk space – 1000MB [ You should not use the disk space more than 500MB for the single domain in shared hosting ]
* Notify upon reaching – You can give 600MB
* Traffic – 1 GB [ You should not use the bandwidth more than 1 Gb for the single domain in shared hosting ]
* Notify upon reaching – 900 MB
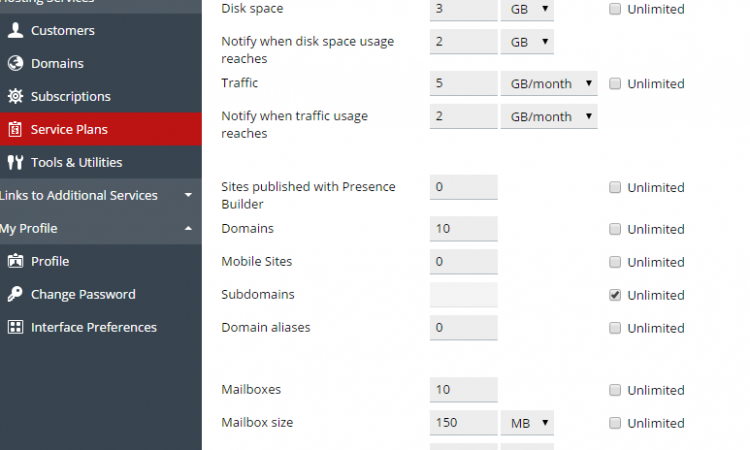
* Domains – 1
* Mobile Sites – 0
* Subdomains – 50
* Domain aliases – 0
* Mailboxes – 25
* Mailbox size – 250 MB
* Total mailboxes quota – 2025 MB
* Mailing lists – 0
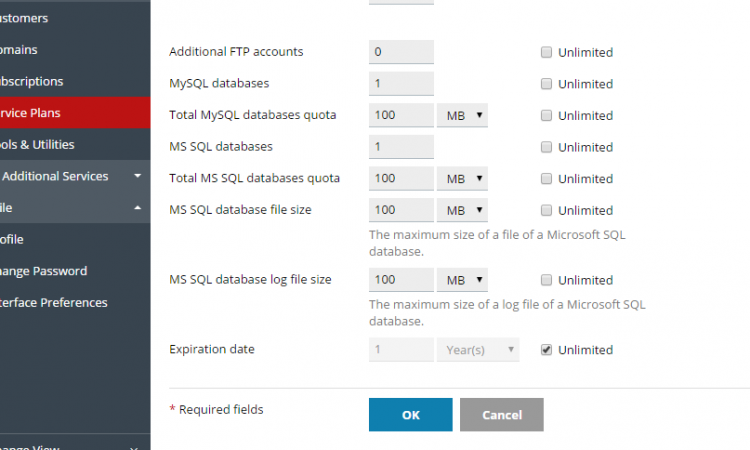
* Additional FTP accounts – 0
* MySQL databases – 0
* MySQL database quota – 0
* MySQL database quota – 0
* Microsoft SQL database quota – 0
* Validity period – 1 year.
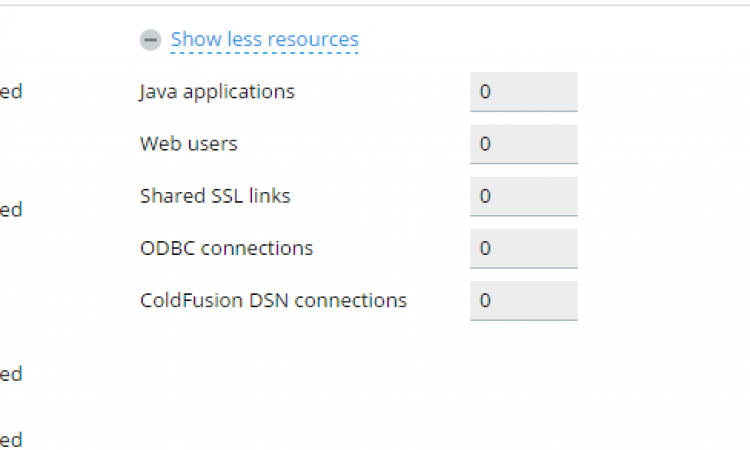
* Java applications
* Web users
* FrontPage accounts
* Shared SSL links
* ODBC connections
* ColdFusion DSN connections
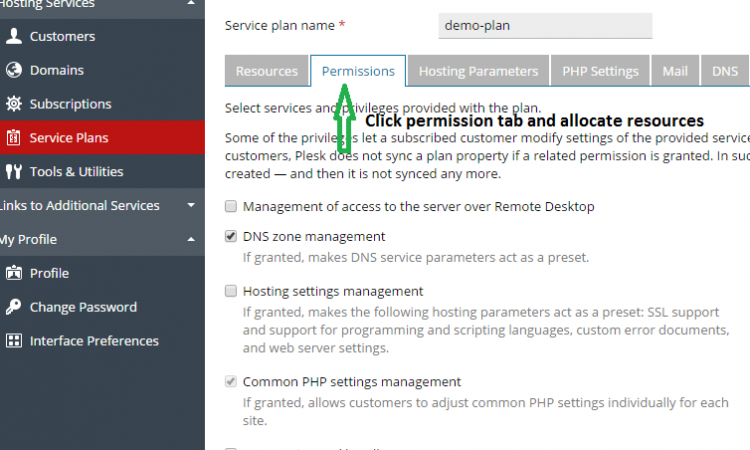
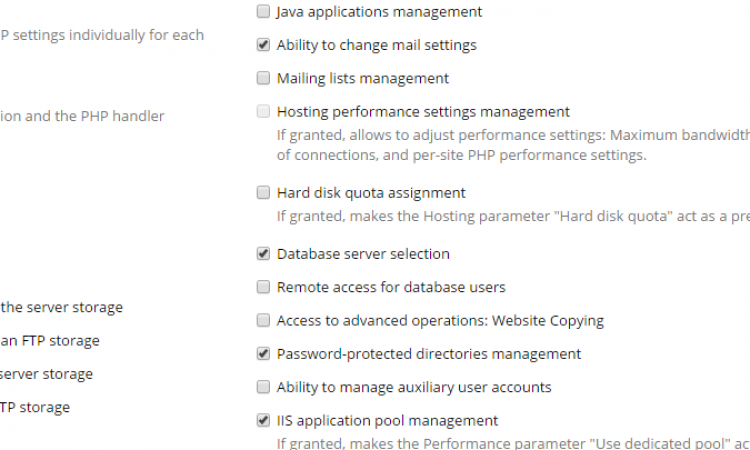
[6] Under permissions option you should set the following.
* Enable – DNS zone management
* Disable – Hosting settings management
* Disable – Management of access to the server over Remote Desktop
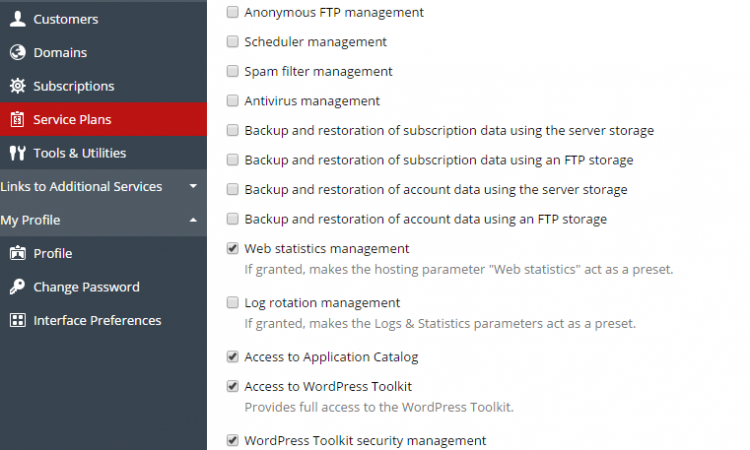
* Disable – Anonymous FTP management
* Disable – Scheduler management
* Disable – Spam filter management [ These are enabled in the server by default ]
* Disable – Antivirus management [ These are enabled in the server by default ]
* Disable – Data backup and restoration using the server repository
* Disable – Data backup and restoration using a personal FTP repository
* Enable – Web statistics management
* Disable – Log rotation management
* Enable – Access to Application Catalog
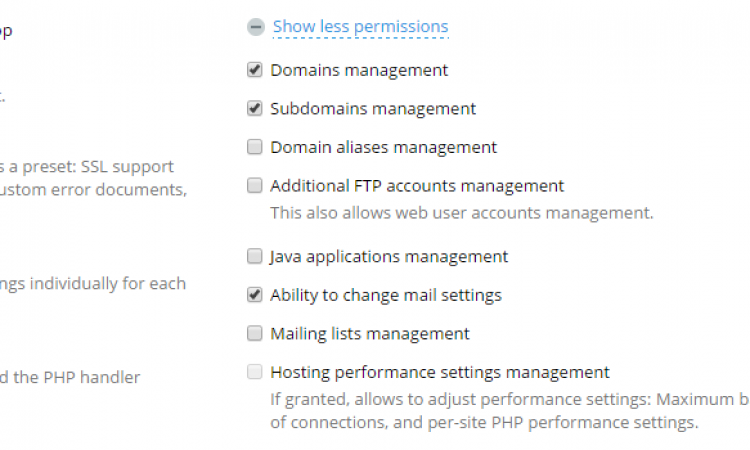
* Disable – Domain Management
* Enable – Subdomains management
* Disable – Enable Domain aliases management
* Disable – Additional FTP accounts management
* Disable – Java applications management
* Enable – Ability to change mail settings
* Disable – Mailing lists management
* Disable – Hosting performance settings management
* Enable – IIS application pool management
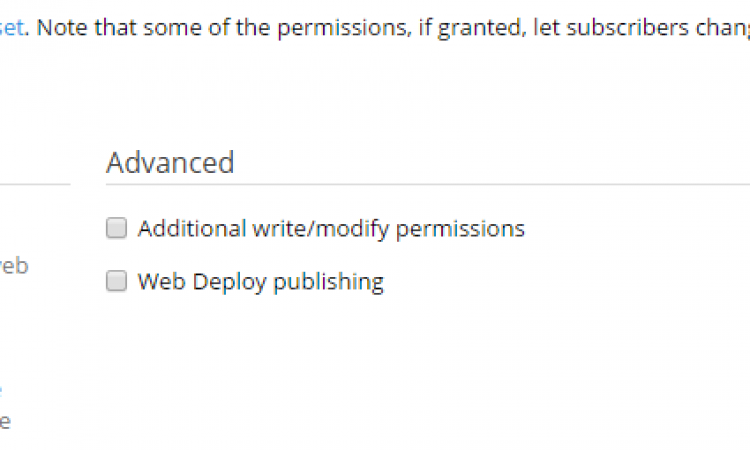
* Disable – Additional write/modify permissions management
* Disable – Shared SSL management
* Disable – Hard disk quota assignment
* Disable – Access to advanced operations: Website Copying and Website Maintenance Mode
* Enable – Password-protected directories management
* Disable – Ability to manage auxiliary user accounts
* Enable – Database server selection
[7] Under Hosting parameters
* Enable the check box – Enable hosting
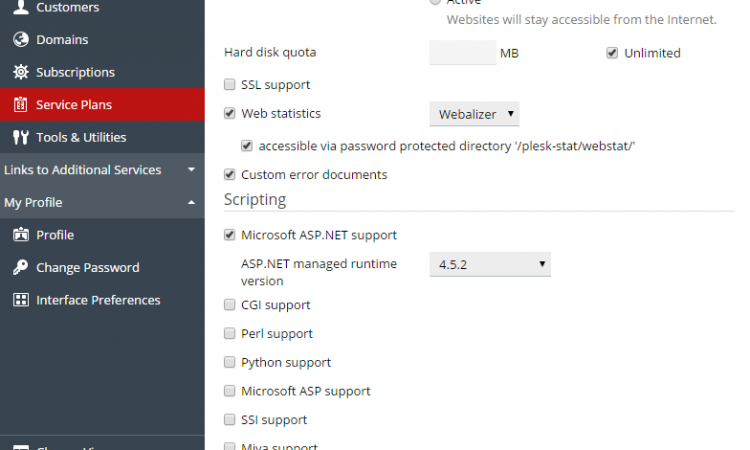
* Uncheck the check box- SSL support
* Enable the check box – Web statistics
* Uncheck the check box – Custom error documents
* Unhcheck the check box – Additional write/modify permissions
* Uncheck the check box – Microsoft FrontPage support
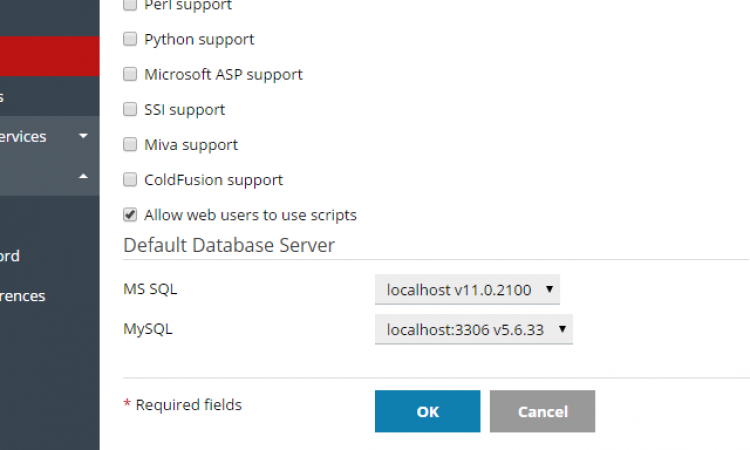
* Disable – Web Deploy publishing
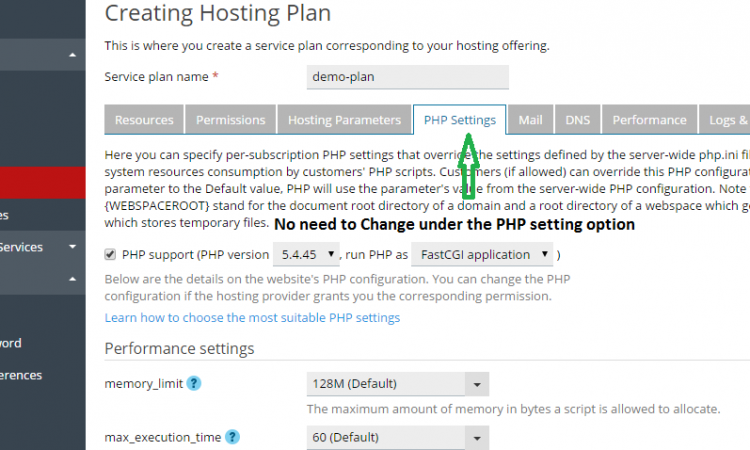
* Enable ASP,ASP.NET,PHP support alone.Rest all keep it as unchecked.
No need to Change under the PHP setting option
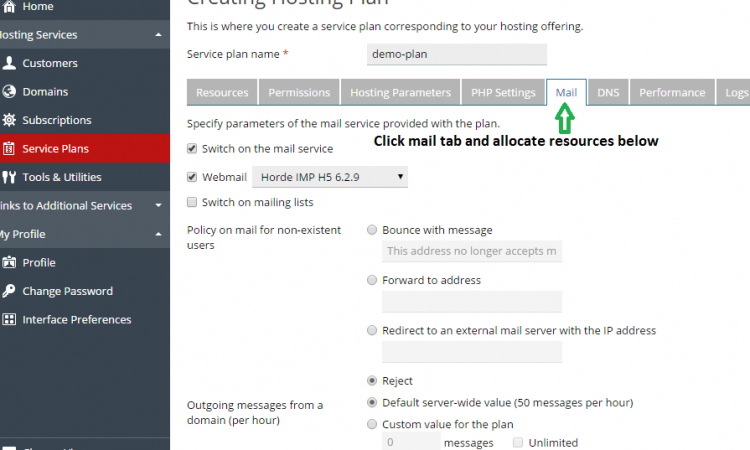
[8] Under Mail option
* Choose the Webmail as Horder IMP H3(4.3.9)
* Uncheck Enable mailing lists
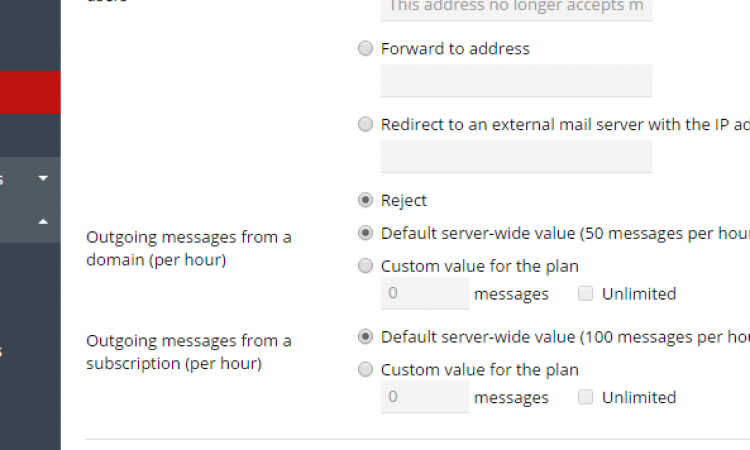
* Choose Reject for Policy on mail for non-existent users
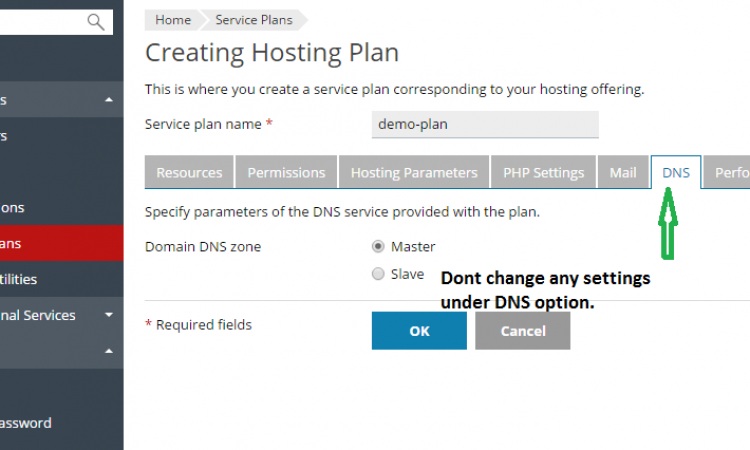
[9] DNS option
Dont change any settings under DNS option.
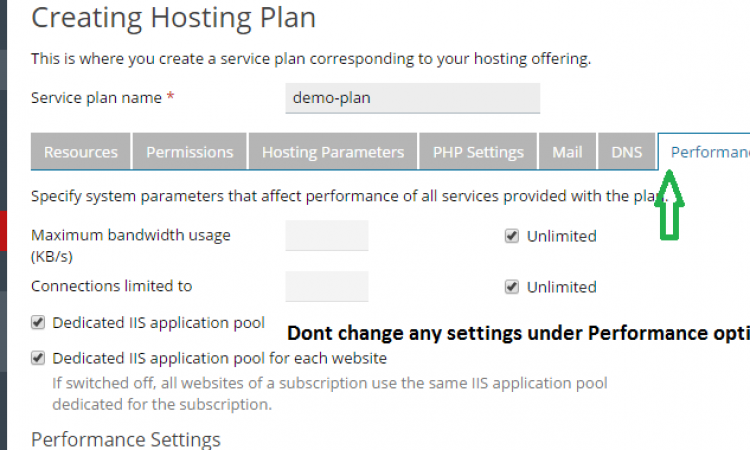
10] Performance
Enable Dedicated application pool.
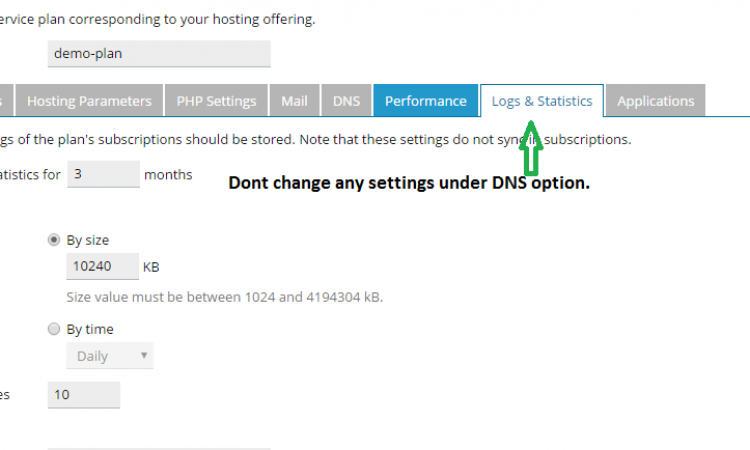
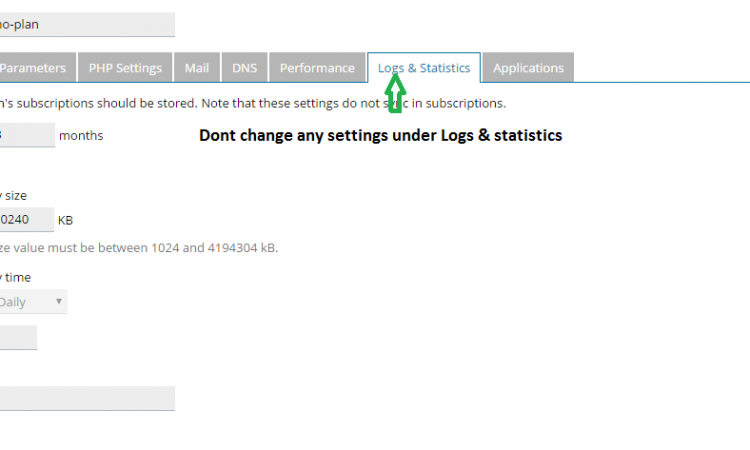
[11] Logs & statistics
Dont change any settings under Logs & statistics
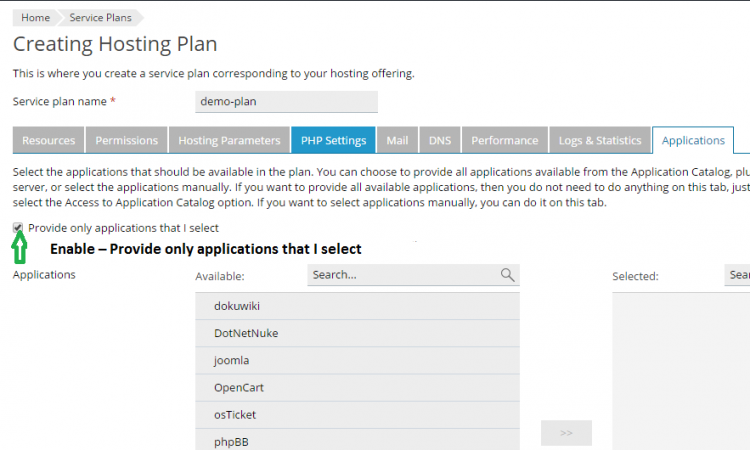
[12] Applications.
* Enable – Provide only applications that I select
Screen Shots
Refer Screen Shots

Troubleshooting FAQs
Reseller Hosting Plesk Troubleshooting FAQs
[sp_faq category=”1772″]